Free roam scenarios are the most simple type of scenarios in Railworks/TS2012. They are good for exploring a route or just testing new rolling-stock without being under the pressure of a task list.
Normally they don't feature any AI train (trains controlled by the sim). In a free roam there are one or more engines/consists that can be selected with the left mouse button.
After the engine/consist has been selected, it is driveable. Just anywhere the tracks might lead you to.
In the Main Menu:
In the main menu select Editor.
1 This page will open:
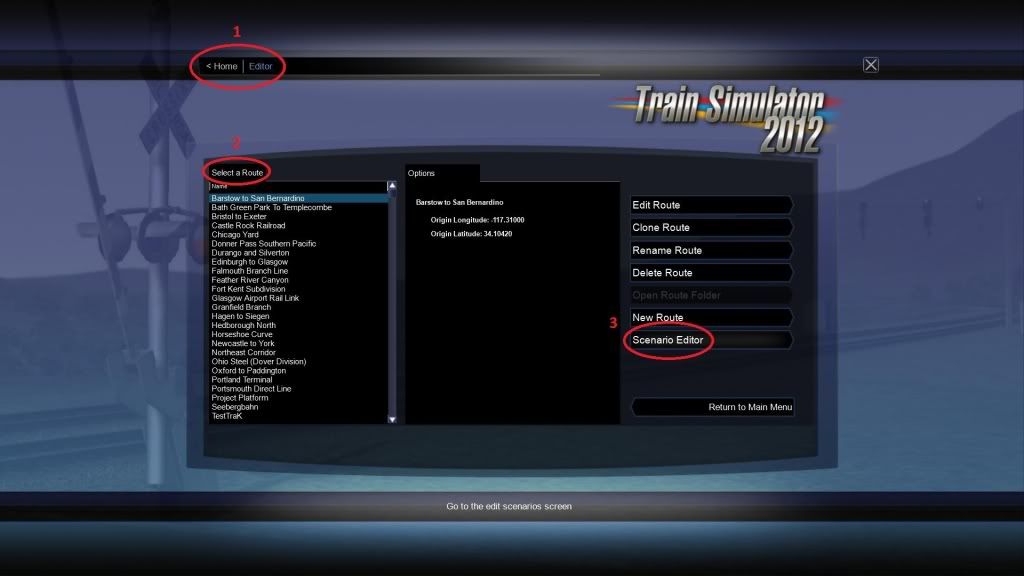
2 From this list, select the route on which you want to create your free roam scenario (you can also do this later).
3 Now click on Scenario Editor. The scenario editor page will open:
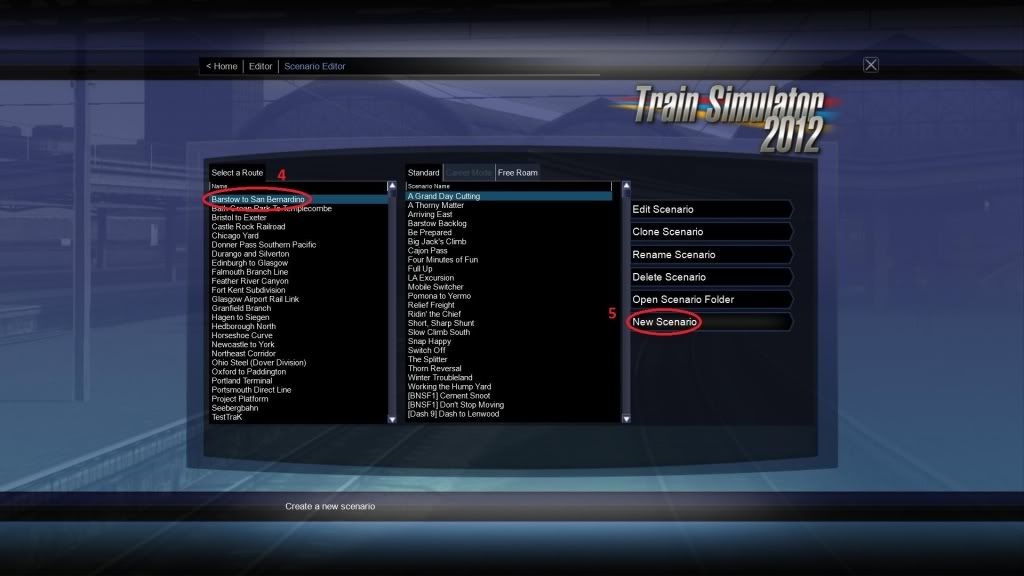
4 If you haven't done so on the previous page, select the route on which you want to create your free roam scenario.
5 Ignore the midddle column and click on New Scenario. The new scenario page will open:
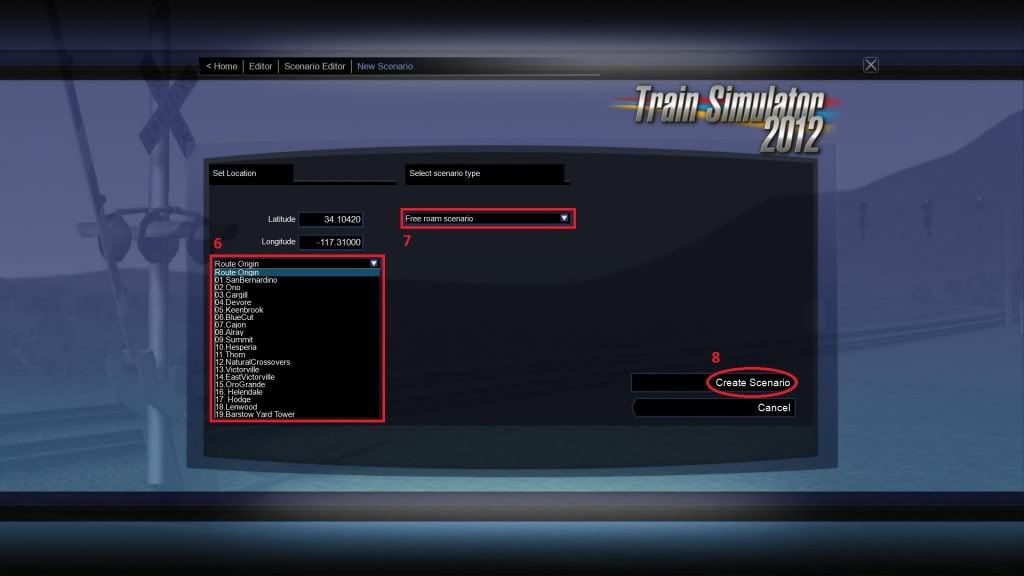
6 From this list you can select the start location of your new free roam scenario. That will be the location where you will enter the scenario and where you will start your journey.
7 Here you can define the scenario type. As we want to create a free roam select Free roam scenario.
8 Now click Create Scenario. A popup window will open:
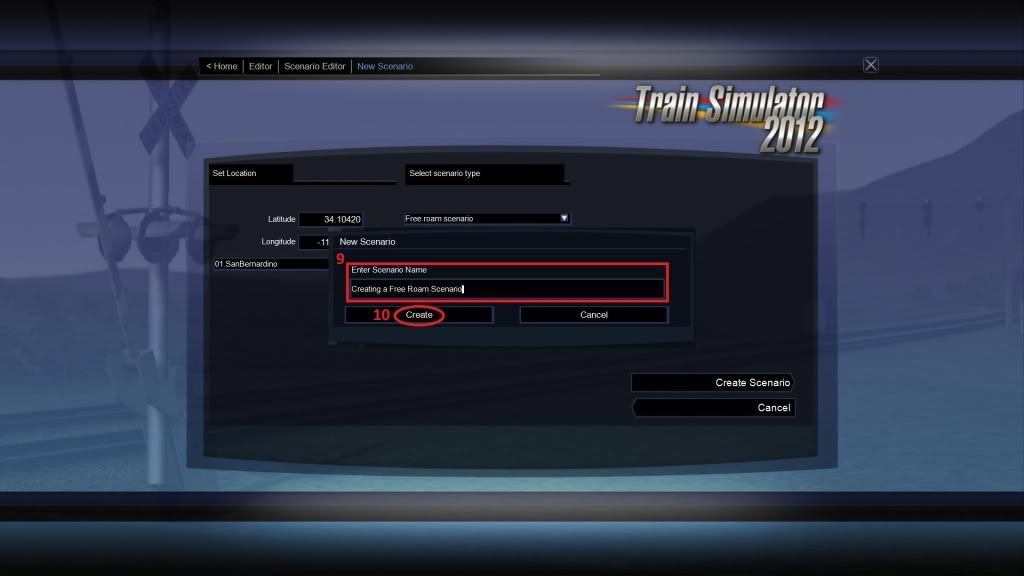
9 Enter the name of your new free roam scenario. You can name it as you wish.
10 Now click Create. The actual scenario editor will now load your new free roam scenario.
In the Scenario Editor:
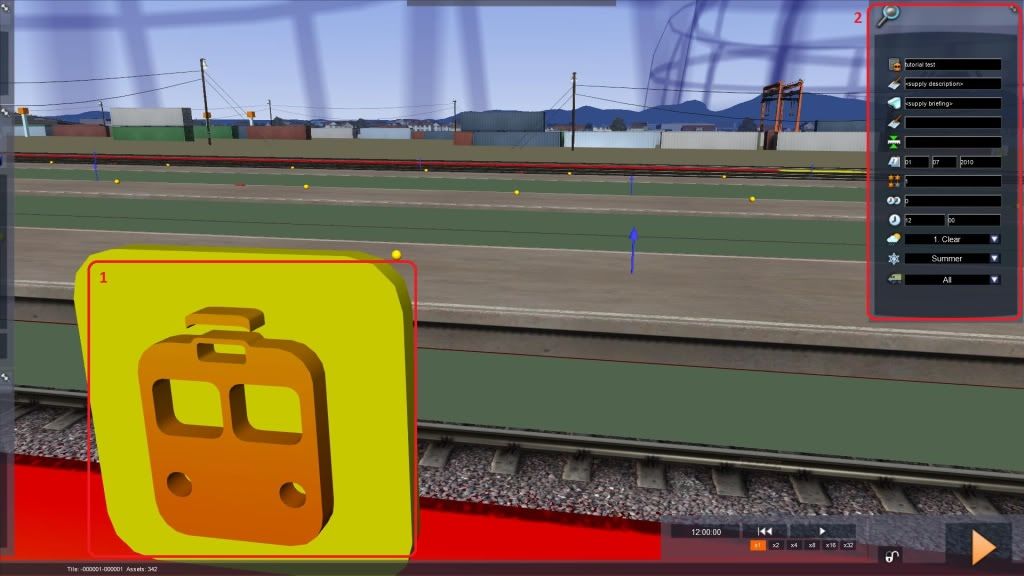
1 Directly in front of you is a white, quadratic symbol. Doubleclick on it. A window, also called flyout, will show up on your screen's right side.
2 To prevent this flyout from disappearing, clamp it with the little pin symbol. There are various fields that determine the sceanrio's start time, weather, season, date and more.
Now hover your mouse over the left edge of your screen. Three flyouts will appear. Clamp them with the pin symbols as you have done before with the left flyout.
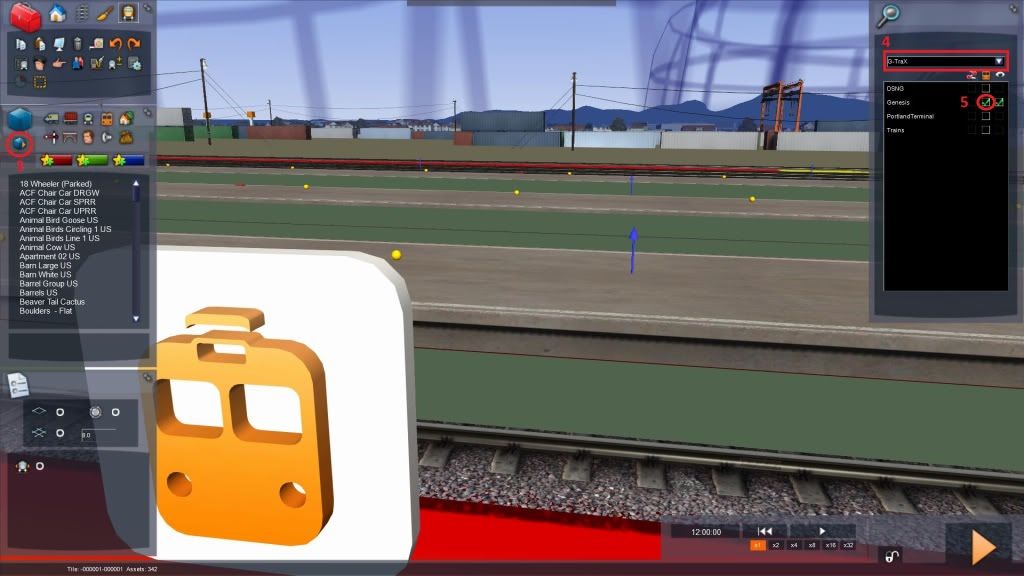
3 If you click on this little box symbol a new flyout will appear on your screen's right side. This is the Asset Selection.
Assets are everything you can see in a route: tracks, trees, streets, buildings, locos, cars ...
These Assets aren't available in a route if they are not loaded/enabled.
4 Every Asset has a provider (normally also indicates the creator of a certain Asset). Select a provider from the drop down list. For example "G-TraX".
5 In the black field below now appear all the Products of the provider selected before. Enable the Product by clicking on the middle box. For example "Genesis".
A green checkmark will indicate if the Product and the related Assets are loaded/enabled for the route.
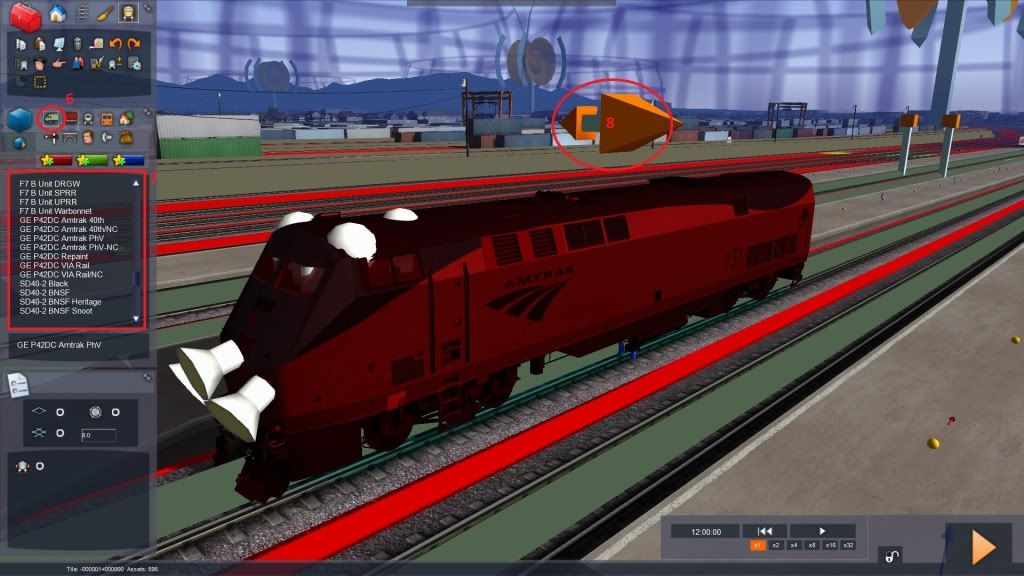
6 Now navigate back to the middle left flyout. Click on the loco symbol.
7 The list below will now show all available locos. As you have enabled the "Genesis" in the right flyout before, there now also is the P42DC Genesis available in this list.
Select a loco from the list and place it in the editor somewhere on the tracks (leftclick). For example the "GE P42DC Amtrak PhV".
8 If the loco is selected there will be a orange double-arrow over it. By leftclicking it you can change the direction of the selected loco.
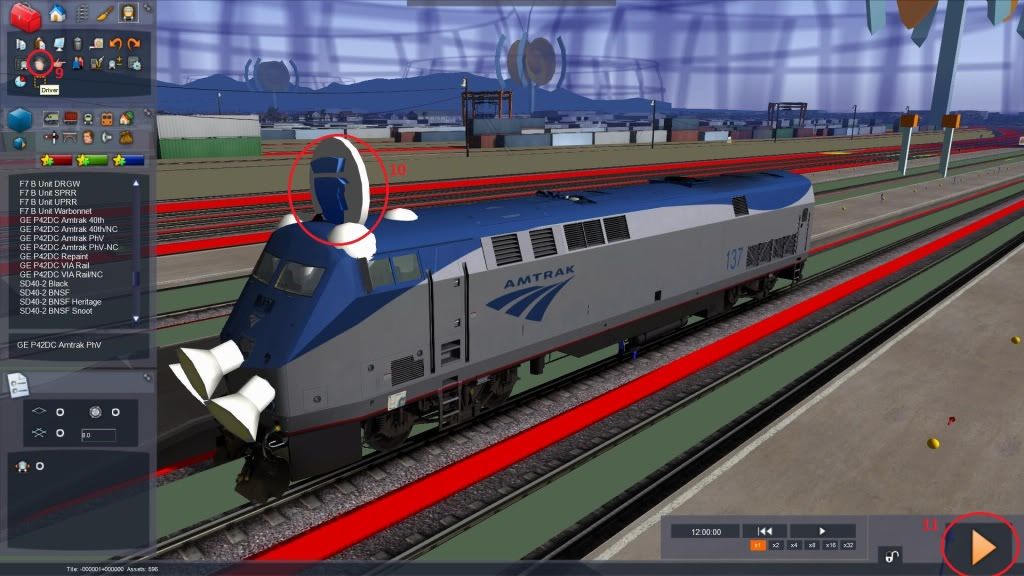
9 Now navigate back to the upper left flyout. Select the Driver Icon.
10 Leftclick in the loco to place the Driver Icon on top of it. The loco is now driveable.
11 Finally click on the orange Play Button in the down right corner. Your settings will be saved and the scenario will load.
Your new free roam scenario is now also availabe in the Drive by Route and Drive by Train options in the main menu.
Done.
I hope this tutorial is easy understandable and helpful. Have fun.