gonarch wrote:ok here is a summary of things -- perhaps this post and conversation will help someone in the future...
- i have replicate the tests described with success
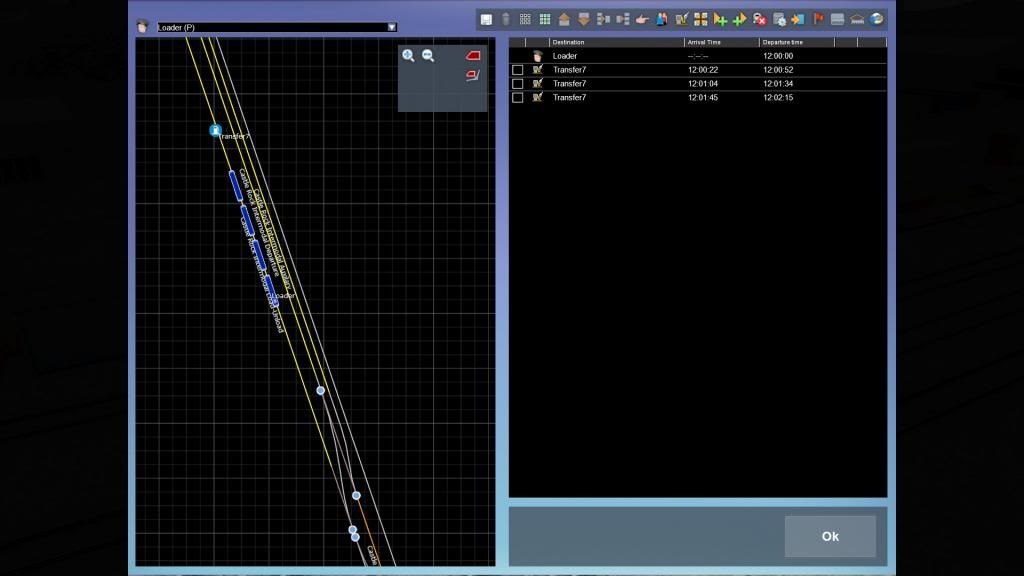
- however (and i have version 2013 the latest i guess) my load instruction does not allow me to select a car, only the transfer point
- but each load (unload) instruction will complete or fail after one car has been processed
- finally the Shift-T initiates an unload yes -- but this command is nowhere in my documentation, and the T intiates only load (contrary to what the docs says)
hope this helps...
Just a few quick comments: the "Pick Up Fuel or Freight" scenario instruction (its official name in the
RW Timetable View Manual) has never allowed selection of a car, just the fuel or loading point to be used. Yes, each instruction covers a single car, just as each "Stop At" instruction covers a single stop (or Go Via). Since you have apparently not bothered to read the
RW Timetable View Manual, here is the section about this instruction:
4.2.3 Pick Up Fuel or Freight
The Pick Up Fuel or Freight instruction is used in conjunction with transfer points in a route. A transfer point is any location where freight or fuel can be added or removed from the player service. Examples in RailWorks include, but are not limited to:
· Diesel Pump
· Water Column
· Container Crane
· Coal Loader
· Coal Unloader
These transfer points show on the 2D map as blue circle with an image of a diesel pump, with the unique name of the transfer point also displayed.
To set up a Pick Up Fuel or Freight instruction you open the instruction properties by clicking the icon in the instruction list. When using the Set Destination icon, the destination in this instance is the transfer point itself.
The Pick Up Fuel or Freight instruction will succeed if the player lines up the relevant part of his train to the transfer point and activates the transfer point by pressing the T key. Once loading is complete the text in the success field will be displayed and the instruction will be classed as success.
The instruction can fail if the player fails to stop at the transfer point, overshoots or moves during the transfer process. In this case the failure text will be displayed and the instruction will count as a failure towards completion of the scenario and the next instruction will become active.
Note: Transfer points must be located on a marker (destination, platform or siding) for the transfer point to be valid.
For future reference, I hope you realize that this entire discussion could have been avoided had you simply read the relevant manual.


