As the name implies, standard scenarios are the standard type of scenario in Railworks/TS2012. This type of scenario is different from a free roam as it sets task for the player to complete:
e.g. running the train to a certain location, assembling a consist, coupling to and uncoupling from cars, making deliveries and pickups
The player is not under the pressure of a timetable when completing these tasks.
A standard scenario can feature AI trains, but there is no obligation to include AI. Everything happening in such a scenario is preset by the author.
Please note: This tutorial assumes that you already have some very basic knowledge of scenario creation as descibed in my Creating a Free Roam Scenario Tutorial.
In the Main menu:
1 In the main menu navigate to Editor/Scenario Editor.
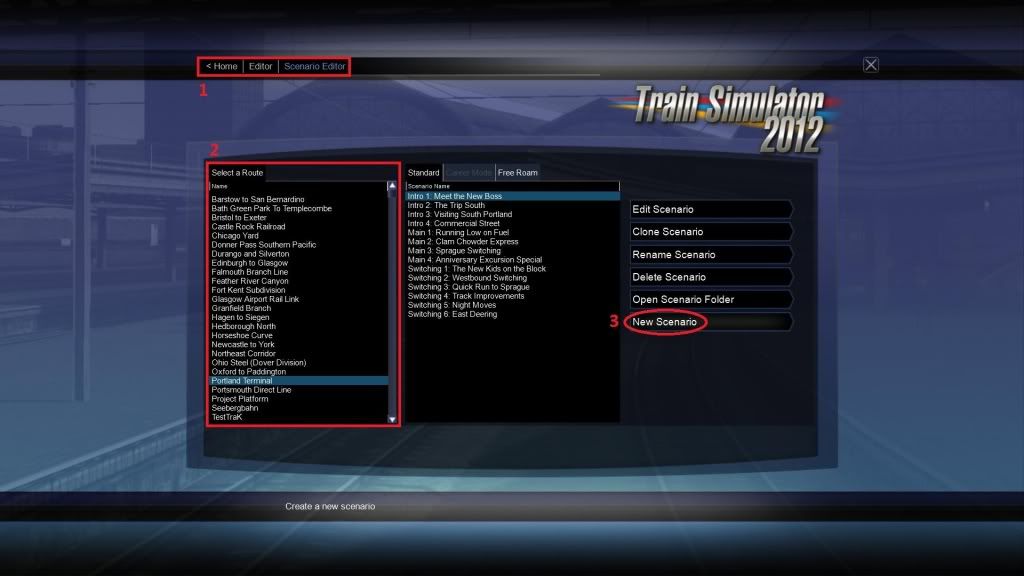
2 From this list, select the route on which you want to create your standard scenario.
3 Now click on New Scenario. The new scenario page will open.
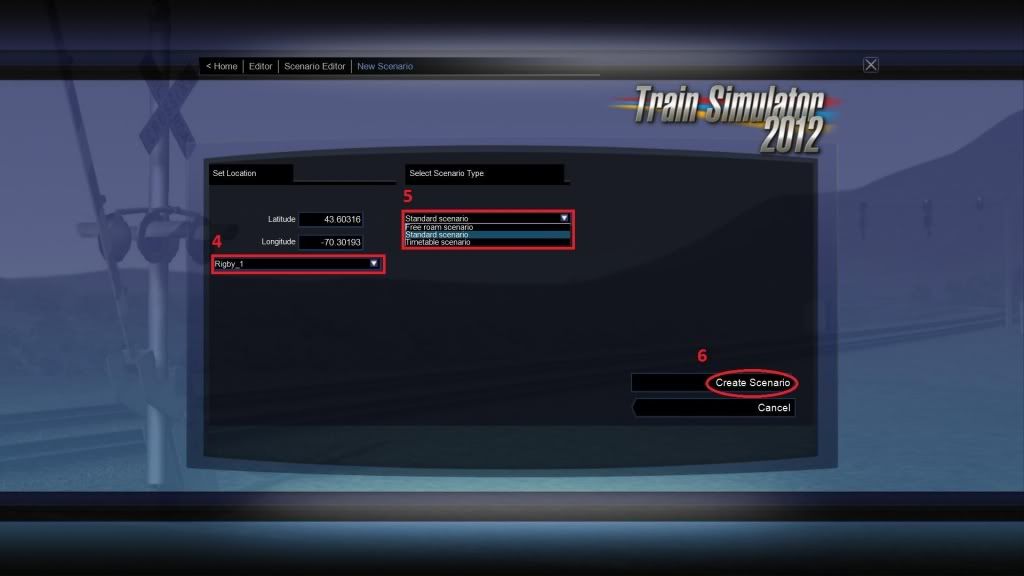
4 From this list select the start location of your new standard scenario. That is the location where you will enter the scenario editor.
5 Here you can define the scenario type. As we want to create a standard scenario, select Standard scenario.
6 Now click on Create Scenario. You can name your scenario and the actual scenario editor will load.
In the Scenario Editor:
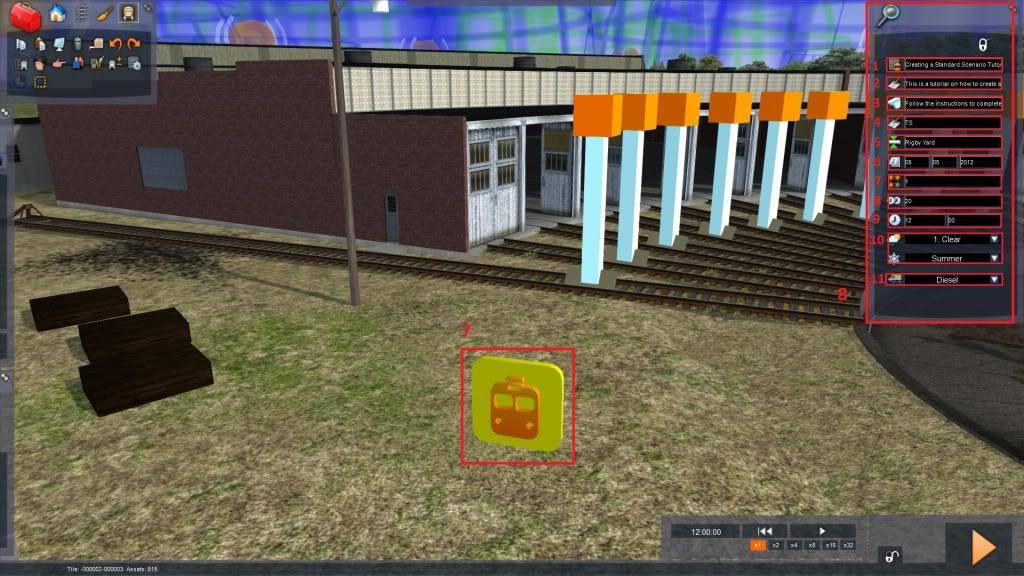
7 This symbol, the Scenario Marker, stands for your newly created standard scenario. It is the location where you enter the scenario editor. Doubleclick it.
8 This flyout appears on the right side of your screen. There are the scenario's properties which can be altered.
- 1 The scenario name.
2 The scenario description. This description appears in the main menu if a certain scenario selected.
3 The scenario briefing. This briefing appears in the scenario if F1 is pressed.
4 In this field, the scenario author can write his/her name or nickname.
5 The scenario's start location where the player will enter the scenario.
6 The scenario date. This is the date on which the scenario takes places in the virtual world. It is in "little-endian" date format: dd/mm/yyyy
7 The scenario difficulty which is displayed besides the scenario name in the main menu. 1- easy 2- normal 3- hard 4- very hard
8 The scenario duration which is the time it takes to complete the scenario.
9 The scenario start time which is the time the scenario starts. It is in 24-hour clock format.
10 The scenario weather pattern and season.
11 The type of player loco: Diesel/Electric/Steam
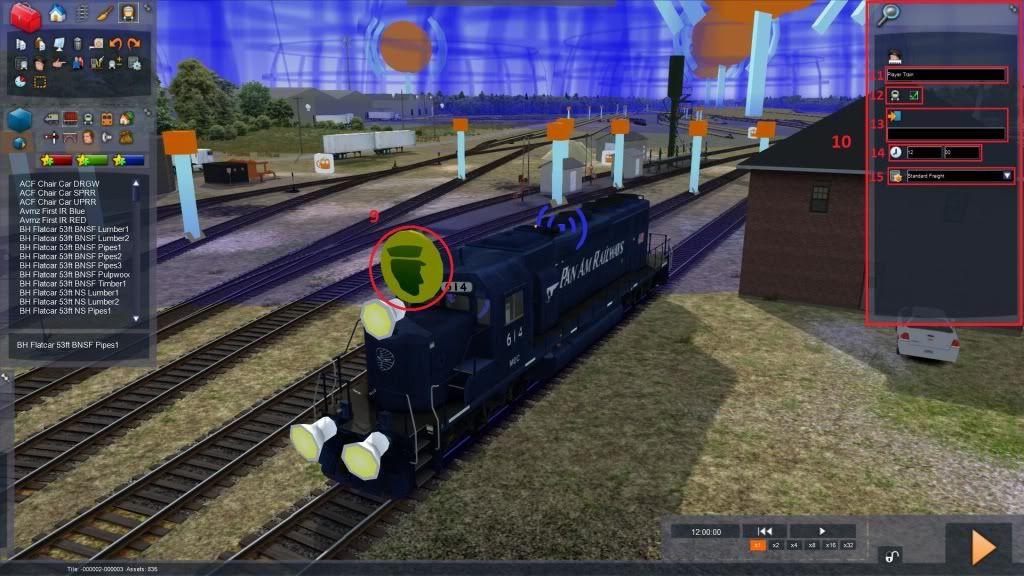
9 Now we need a loco that can be controlled by the player. Place a loco onto the tracks and furnish it with a Driver Icon. Doubleclick this icon.
10 The loco properties flyout appears.
11 This is the player train name.
12 This box defines if a train is the player train or not. Check the box to make this loco the player train.
13 The player train's Final Destination (has nothing to do with the movie series
 ). This is where your scenario will end. Leave it blank for now (it is better to define this in the timetable view later).
14 The player train start time. Make sure it is the same time as the scenario start time.
15 The train type. This basically defines the priority of a train. As this scenario will not feature any AI train, it doesn not really matter, but set it to Standard Freight here.
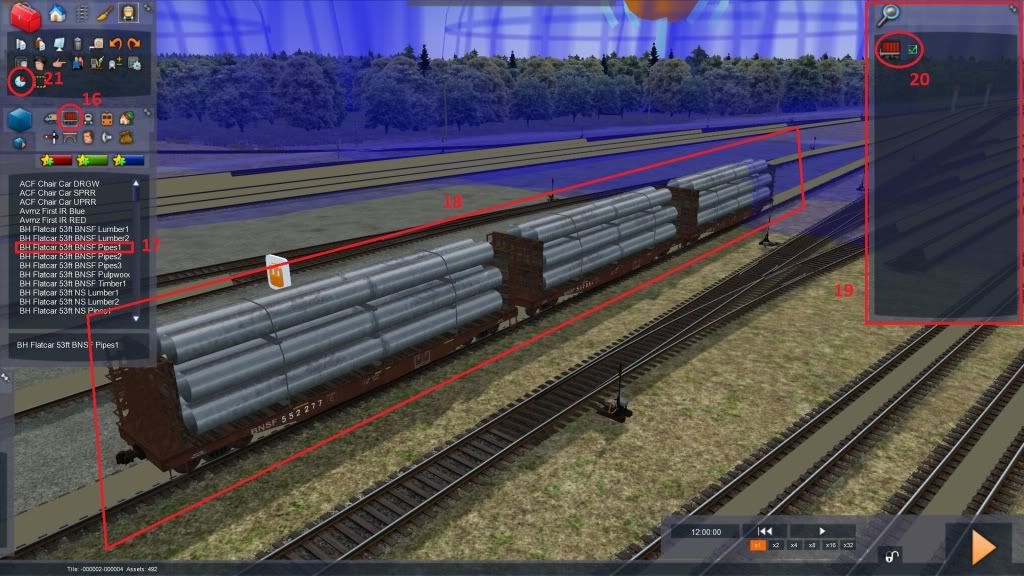
16 As the scenario should also feature a pickup, we need some freight cars.
17 Select them from the list in the left flyout, just as you have done with the loco before.
18 Place the cars somewhere in a siding (indicated by a colored line on the tracks).
19 Alt + Doubleclick somewhere on the cars and a flyout will appear - the consits properties.
20 Check the box to load the freight cars. This is not necessarry, only a nice extra feature I want to show.
21 Now we come to the heart of scenario editing - The Timetable View. Click on the symbol located in the upper left flyout.
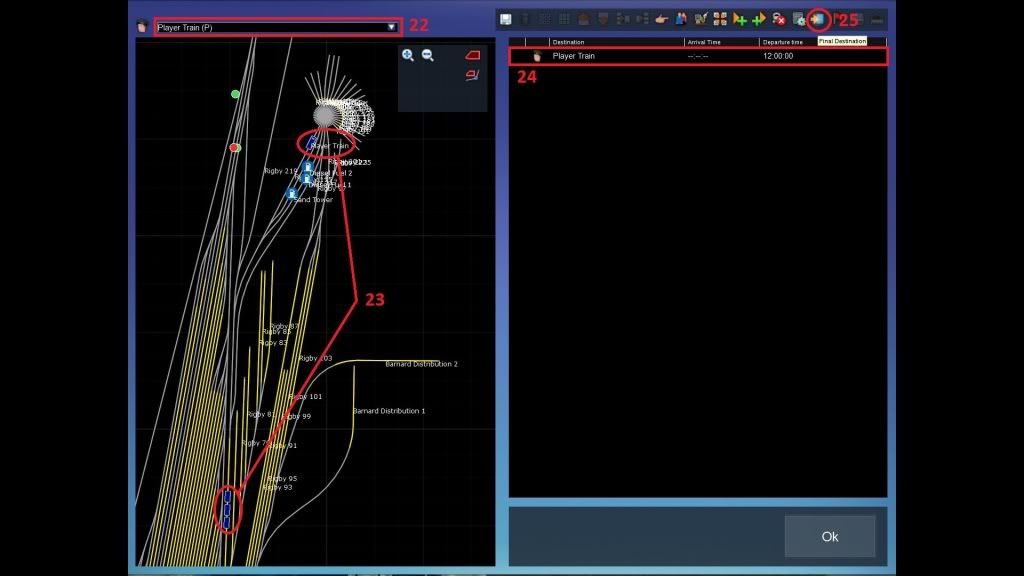
22 Here you can select the different trains on the route (everything furnished with the Driver Icon). The player train is indicated by a (P) symbol, no matter what name you gave it.
23 On the left is a diagrammatic 2D map of the route. Amongst other things it shows all tracks, signals, consits and locos.
24 This is the task list. It displays all tasks of the currently selected train. Currently there is only the player train's start time.
25 Let us change this. Click on the Final Destination icon to add the final destination task to the list.
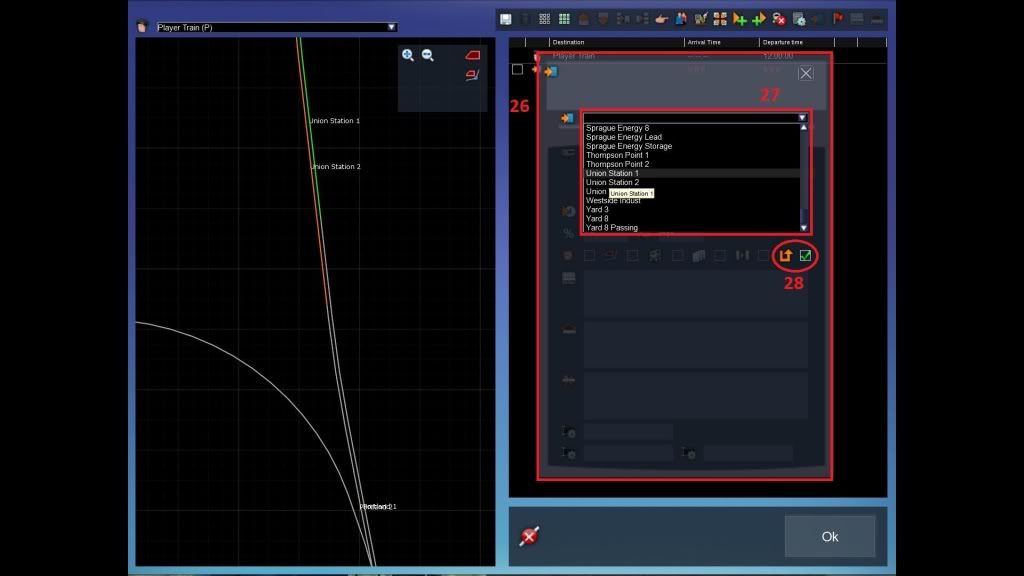
26 This (movable) window will appear. It defines the details of the final destination instruction.
27 In this list there are all sidings, destinations and portals found on the route. Select a location where you want the scenario to end.
28 This box defines if the respective train is allowed to change directions while it proceeds from the instruction before to this one. In this case leave it checked and then close the window (the route layout requires the player to run in reverse so that he/she can couple to the freight cars).
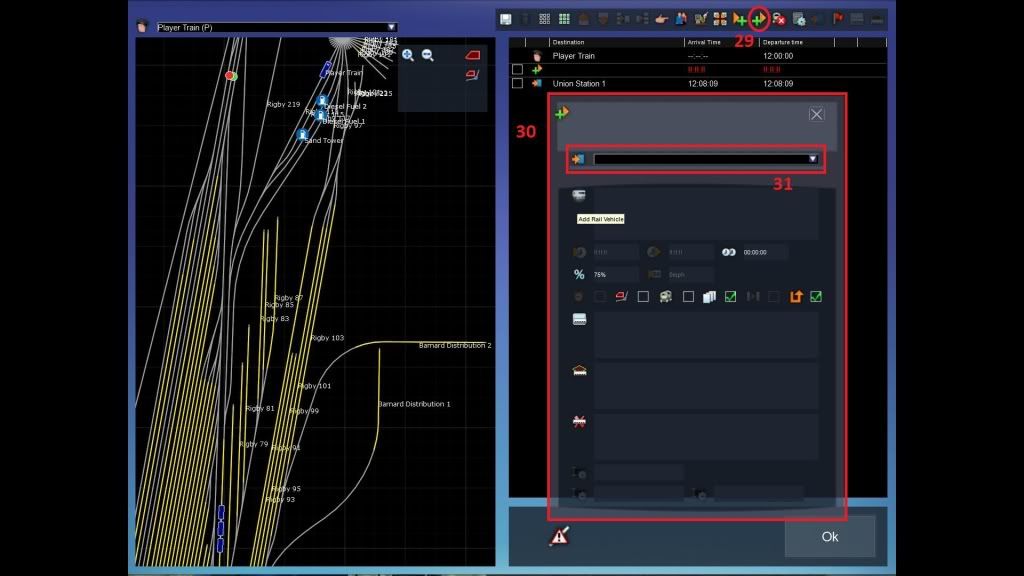
29 Actually we already have a complete standard scenario, but it is a boring one. Lets add a pick up instruction. Click on the Add to Back symbol.
30 The Add to Back Instruction properties window will appear. (There also is the instruction Add to Front, but we want the freight cars coupled to the loco's back.)
31 From this list select the siding where the previously placed freight cars are located. You can search for the siding's name in the 2D map on the left.
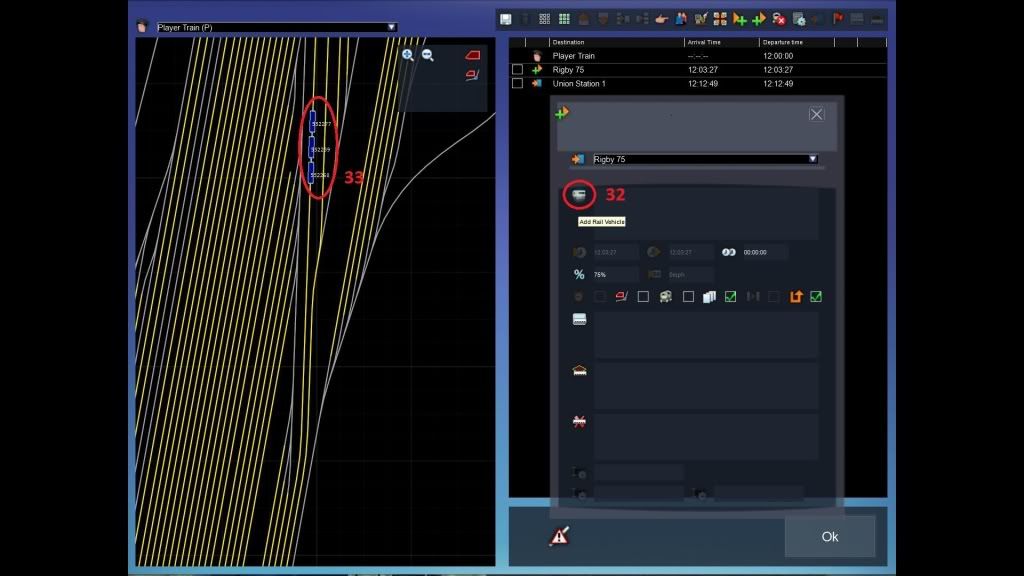
32 To define the cars you want to have coupled to the loco, click on Add Rail Vehicle.
33 A individual car number will appear besides all rolling-stock in the 2D map.
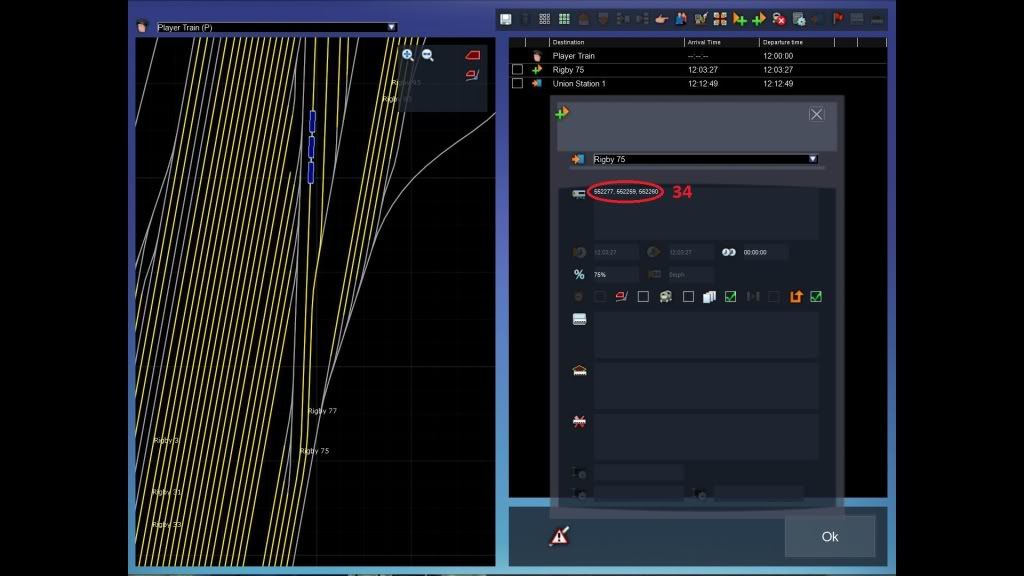
34 Either you enter the car numbers by typing them into the box (separate with comma), or you simply click on each railcar in the 2D map to add it to the list (note: this method requires clicking on the Add Rail Vehicle button after each addition). When finished, close the window.
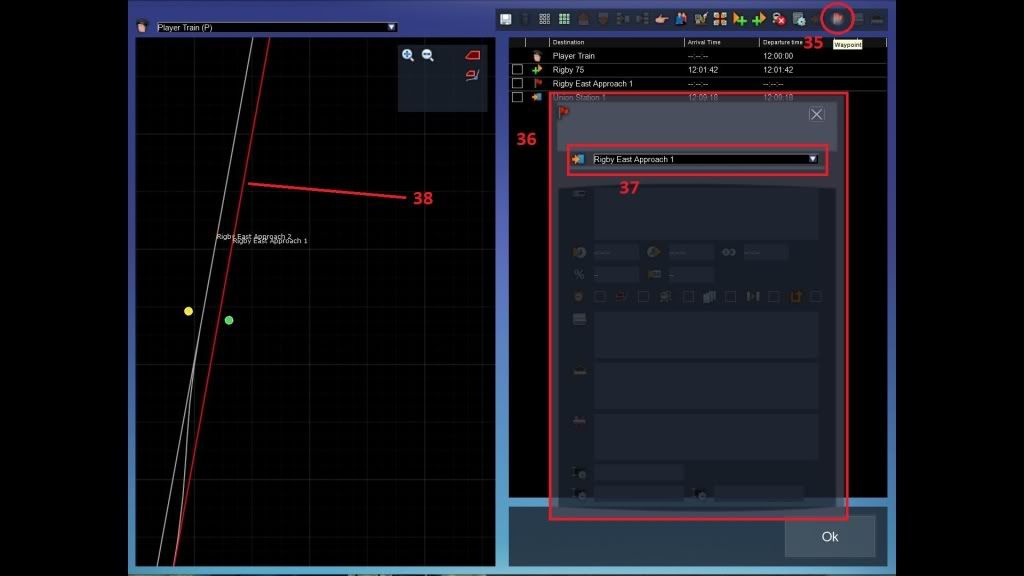
35 You can manually define the paths trains will take by using the Waypoint instruction. If you do not do that, the game will automatically search the "best" path. To be honest, most of the time it is not the best.

Better you manually define the train paths. Click on the Waypoint symbol.
36 The waypoint properties window will appear.
37 Select your waypoint of choice from this list. It always helps to look on the 2D map to see where a possible waypoint is located. Close the window.
38 The path of a currently selected train always appears on the 2D map as red line, also if you have not defined any waypoints manually.
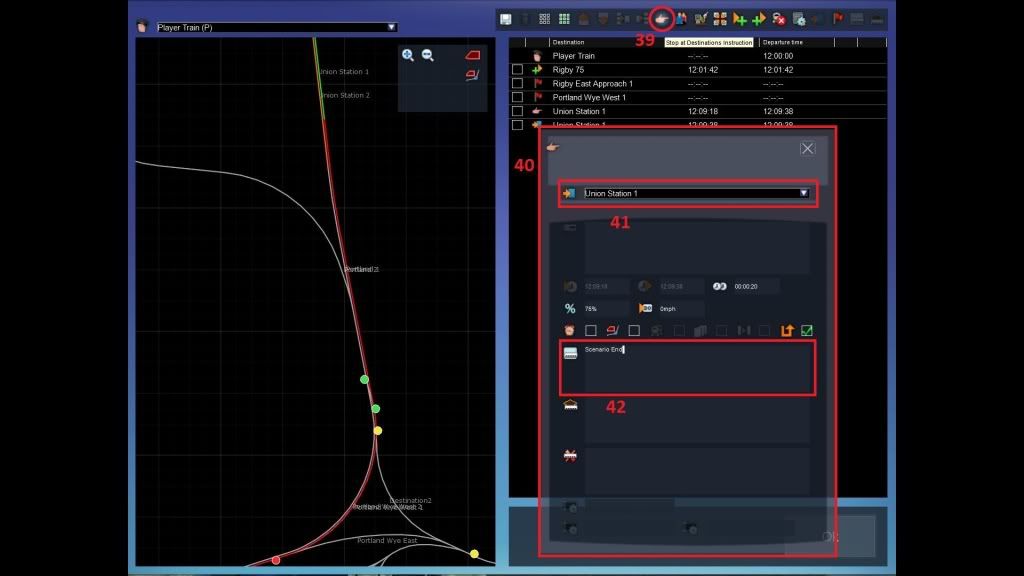
39 The current task list will end the scenario as soon as the player train passes the previously defined Final Destination. If you want the player to stop the train beforehand, you need a Stop at Destinations Instruction. Click on the symbol.
40 The stop at instruction properties window will appear.
41 Select the destination where you want the player to stop the train (it also works with AI trains btw). In this case, it is the same as the final destination.
42 If you want the player to see a message after he/she has stopped, enter a text here. It will then pop up in game. Close this window.
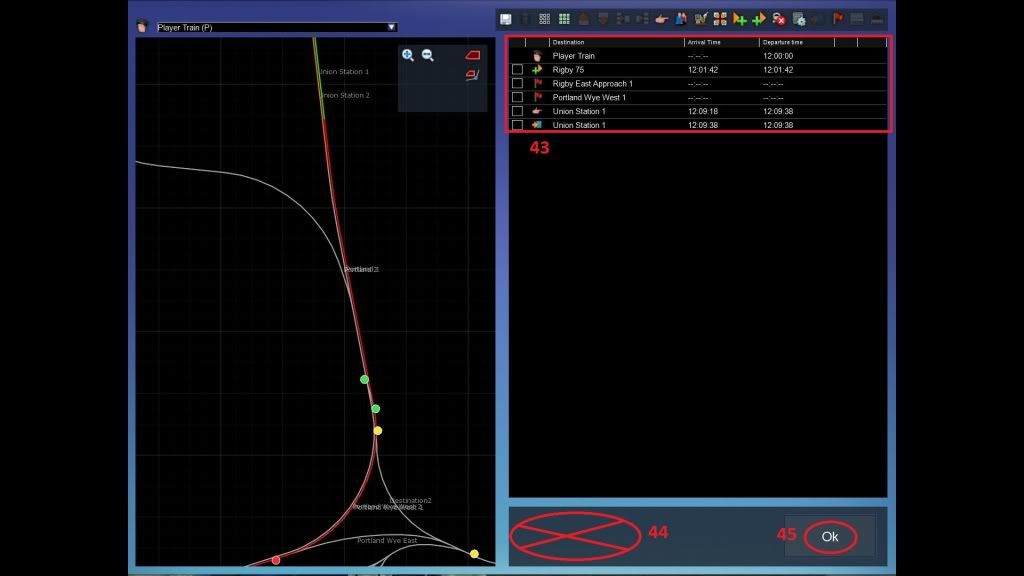
43 You can now see all instructions added before. Inalienable is the Final Destination instruction. Everything else is not necessary.
44 You see nothing here? Good, very good!
 I better don't tell you what you could see here because If you see a symbol here, your scenario probably will not work correctly.
45 Press OK.
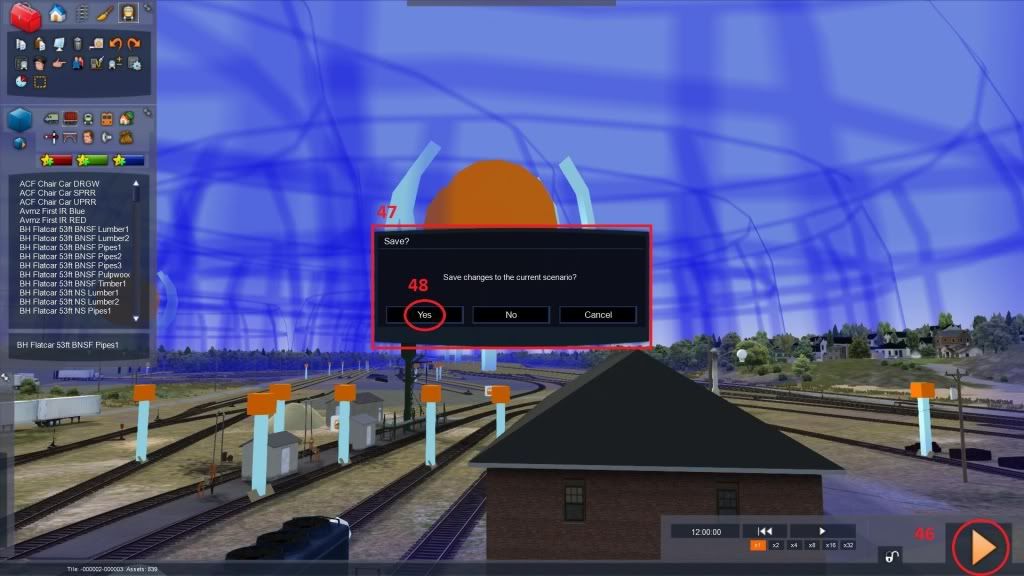
46 Press the Play symbol.
47 The Save? window will appear.
48 Click on Save. If you don't do that and click "No", everything will be lost.

Done.
There are a lot of new things in this tutorial, especially important the most basic instructions are featured. There are some more instructions I didn't show.
To fully master the Timetable View, you need to know all of them. However, the basics are sufficient for a "standard" standard scenario.
Remember: Scenario editing can be very frustrating. Sometimes a lot of trial and error is necessary, but if you know your basics well, you can minimize this.
I hope this tutorial is easy understandable and helpful. Have fun.