Driving Tutorial for a total newb

Discuss almost anything about RailWorks.

Driving Tutorial for a total newb

Unread postby Rounder » Sun Sep 19, 2010 2:12 am

Hello everyone, I just bought RW off of steam. This might be a long-winded post, and for that i am sorry.

This is my first train simulator. Unlike probably most of the people here I am not a real train enthusiast, nor am I a game designer. I wasn't sure I would like the game at first, but being a fan of FSX while not being an avid flight/aircraft enthusiast, i decided to give it a try. The graphics seem a bit dated, after some reading I understand why and its not a big deal; my experience with the game has been really good so far. But I have many questions I have been looking for answers to in the manuals, on the forums, and the relevant web sites but the only thing i have found in 3 days of searching is game design tutorials. This is the first game I've ever played that has nothing at all on how to play the game besides what buttons do what (and the signals guide) so hopefully some really bored knowledgeable forum member here can help me out. Thanks ahead of time.


1. I do not know how to drive a train- Right now I'm on expert control mode and have done a bunch of scenarios successfully, but I don't how to properly brake. Given there are 3 different brakes on most of the trains i see, I must be doing it wrong. I usually use the train brakes for all my regular stopping and slowing down on grades, then freak out and use all three when I blow a signal or speed limit change.

Braking-When should you be using each of the braking systems? I've read that people use the reverser for a lot of braking, but that doesn't seem right.

When going up or down a grade, is it ever ok to 'ride' the brakes to keep a steady rate of speed? Or should I brake (or accelerate) to below (above) the speed limit then coast and repeat? In a related question, do train drivers generally max out the speed limit at all times using the brakes and throttle to maintain constant top speed, or do you get as close as you can maintaining a constant throttle?

Speed limits, I notice at the end of scenarios I get each speed infraction listed. Are speed limits a recommendation or a hard rule?

I assume sand is for increasing traction but how do I know when I need to use it? During bad weather with wheel slippage? I haven't come across that situation yet.

Junctions. I'm having a hard time sometimes in the big yards locating my junction and/or finding the path to the junction. (I already know to use the tags [F keys] but some of the yards are huge). I use the 2d map and the driver guide but the driver guide only shows you a few feet ahead, and when I start using the 2d map, i can blow right buy the junction. Is it a matter of learning the yards or counting junctions, or what?

It seems like I never really have to use a junction switch unless I'm at a train yard. Is this a safe assumption, or are there scenarios out there where i will need to watch junctions the throughout length of the trip?

2. Like I said before, I'm not so much into the trains themselves as the process, and doing scenarios is my kind of thing. I'm in the transportation industry and can relate to many of the aspects of the game, (on time, being safe) without it seeming like work. I plan on purchasing some of the add-ons, mainly the new tracks (maps whatever you call them) and some of the trains that include scenarios i would like to try. I admit I see lots and lots of files around here but they all seem to require some expansions or downloads or custom somethings or other. Are there any vanilla user created scenarios or maps out there? building a route seems absolutely too time consuming and difficult for me to try.

3. Lastly, Steam locomotives. Just looking at the controls makes my head hurt. Are they easier than they look? If someone could give me a quick run down (or a link) to driving these guys, i would appreciate it.

Sorry for the long post. Thanks for any help. **!!bow!!** Rounder
Rounder
 

Re: Driving Tutorial for a total newb

Unread postby harryadkins » Sun Sep 19, 2010 9:32 am

Hi Rounder. You sound like every one in this forum at one time or another. My advice is practice and patience. A couple of observations for you: 1) Real trains don't do anything quickly. Every process of acceleration and braking is slower and more gradual than even an 18-wheeler. 2) Speed limits and signals are absolute. Bad things happen when real railroaders ignore these traffic control devices. Generally, most real railroads use a combination of all three brakes, depending on the situation. Dynamic brakes work well for long descending grades and locomotive brakes work well for yard switching. I use the F5 and F3 moniters all the time to help me operate smoothly. Smooth operating skills come after practice, so try to do a variety of activities as you get started. Remember that you can save an activity with F2 and come back to it later if you want. Finally, the many Railworks forums such as this one offer a great deal of help as you will learn to search. I bought MS Train Sim the day it was released and did the same for Railworks. They have given me countless hours of relaxation and fun. I hope they do the same for you.
User avatar
harryadkins
 
Posts: 3248
Joined: Sun Aug 23, 2009 8:01 am
Location: South Carolina, USA

Re: Driving Tutorial for a total newb

Unread postby LoneWolfDon » Sun Sep 19, 2010 9:46 am

I can't offer much advice on some of your questions, as perhaps they are more for RailWorks users who are more knowledgeable than I about some of the specifics you ask, as myself I still usually drive with controls on Simple mode. I like to just jump in a train and go and not overly worry about micro-managing everything (which for me, Simple mode is still challenging enough) which one would probably need to do more in Expert controls. From the game's options you can find there are also certain settings you can select or de-select to make things either a bit harder or easier.

Different locos, routes and scenario can all be unique in their own way, and a lot of times it takes practice, trial and error to get the hang of things. Some routes and scenarios are a lot more confusing to figure out than others, just as some locos seem easier to drive than others. It does get a bit easier as you become more familiar with it all though. Though, like you, I can get overly confused and "lost" on some of the bigger railroad yards, especially if the scenario calls for lots of shunting and junction switch throwing. The 2D map is helpful in this case (Pressing 9 will bring up), and you can zoom-in and zoom-out with using the mouse-wheel. Also a good tip when in the 2D map, if you see a junction point you want to switch, hold the Shift key then Left-Click with your mouse and it will throw the switch on that junction. You will see a thicker-gray-line of which path a particular junction is set for. I try to plan the path a bit ahead of time if the scenario calls for lots of throwing junction switches. Chances are when in a railroad yard and doing shunting and switch-throwing, you'll either be going at a slow speed anyways, or you're train will be stopped as you may need to be on a section of track, throw a switch behind you then backup onto a different track, etc.. so that's a good time to take a good look at the 2D map, zoom-in, see the paths set for the junction-switches you may need to throw, then "Shift & Left-Click" on any junction-switches to set my path, etc...
Also, bringing up the labels for things (F6 I believe) when in 3D view can be somewhat helpful too as you mentioned.

You ask for a good user-made route that works with vanilla RailWorks and not needed to download anything extra to get it to work. So for a ready-to-go route that comes with several scenarios that works with default stock and assets, you might want to check out a route I made,
"King's Arm Highway" on this page: http://railworksamerica.com/fl/rts.html
Or direct download for my route here:
http://railworksamerica.com/cgi-bin/dl- ... l?file=092
Or for more info on my route and some other goodies, check out my site over at:
http://www.rryard.com/

For a couple of extra scenarios that can also be used on my route that works with default stock, you can download a bonus scenario pack here:
http://railworksamerica.com/cgi-bin/dl- ... l?file=096

Be sure to check out the "ReadMe" files that comes with my route and scenarios for instructions of how to install (which uses the RailWorks "Install" from the Package Manager), plus there may be one extra optional scenario (An optional version of the "King's Coal" scenario, more info on that in the route's ReadMe file) that requires a download of a free re-paint of a loco, but it's not necessary to run my route or any of the other scenarios.

I've tried to make a couple of my scenarios somewhat like a partial "Tutorial" of sort (Such as the "King's Coal" scenario), which if you read the messages that pop-up at various times during the course of the scenario will give instructions of what to do next or what key-to press if required to perform a certain action.

It's just been brought to my attention a couple days ago though that a couple of my scenarios now seem "broken" (though all of my scenarios worked perfectly when I released my route), so if a certain scenario seems you're not getting any closer to the next destination, chances are you may need to manually throw a junction switch to set the train's path properly to the next destination.
It seems something in recent updates to RailWorks caused some things to mess up in a couple of my scenarios (I think somehow some update from RailWorks reset "junction save settings" for certain scenarios, or it may be something to do with how they fiddled around with the speed / distance stuff), so once I find the time to go in and look things over and try to fix a few things, a couple of my scenarios may seem buggy. Once I get around to getting all of my scenarios fixed again, I'll upload a new version here and post a message on the forums to let people know.

Still, several of the scenarios still seem to be working okay, plus there's a few Free Roam scenarios as well if you just want to drive around my route and also get in some practice of driving some different trains.

Cheers! :D
RailWorks Route & Scenario addons, video tutorials and other resources at http://www.RRYard.com
User avatar
LoneWolfDon
 
Posts: 279
Joined: Wed Dec 16, 2009 1:41 am
Location: Canada

Re: Driving Tutorial for a total newb

Unread postby Toldrabald » Sun Sep 19, 2010 11:45 am

Hey welcome aboard!
I think I can give you some more details to some of your questions, but what the two guys before said is already essential: learning by doing *!!wink!!* Every loco behaves a bit different in different circumstances and on different routes. So you will need 3-4 runs with one model on one route to get a feeling for it, on the next route it just takes at least one to learn the route (e.g. breaking points, gradients, signals, ...) and less for the loco. I don't know how it is with flightsim, but at least realworld pilot have to make a new "driving" licence for each different aircraft. Somehow like that is it with trains. Only that they -in theory- all work the same way.

1) breaking: What I do most of the time on hillside routes when going downwards is to let roll the train from under the speed limit and let it speed up until I reach it and then break again down by 5-10 mph. But I am no train driver and have no experience with real trains at all, so don't know if that's correct. But it works for the most scenarios to reach everything on time ;)
sand: is used in autumn and winter when the rails are slippery to start the train. In RW I haven't found a real purpose for it yet, but in winter you sometimes notice a difference in acceleration. Here I have some real experience, but only from trams *!lol!* They use it in winter and also for emergency brakes.
speed limits: absolutely important! (sort of) When you're too fast with your car on the highway you will get your ticket from the police, when your train is too fast and a narrow curve is ahead it may derail and fall over from the g-forces. In my experience 5 mph over the top isn't too bad, but as you said it gives negative points in the results. And in the career scenarios you will loose your points very quickly if you're speeding.

2) maps are called routes ;) Most scenarios will require payware, some way too much for me so I never try. The ones using only default stock are rare to find, if I make any scenarios I always try to use as little payware as possible. Sadly other designers don't think so and throw in everything they have. Currently I've only finished two scenarios for Glasgow Airport addon, nothing american, but I've got one on my to-do list. Will definitely require payware, but only for the player's train and no additional ones. Or I'll give out an alternate version without payware. Herefor you should have a look at RWtools, a very handy managing tool, which can easily swap out complete trains in scenarios.

3) To just drive steam locos is kind of easy once you understood the system. To drive them really good and reach their top speeds it requires training, knowledge and a lot of patience. I ain't got enough patience so all my steam trains arrive late on scenarios and I don't use them often, but it's not too difficult.
Toldrabald
 
Posts: 166
Joined: Sat Jun 12, 2010 8:57 am
Location: Germany

Re: Driving Tutorial for a total newb

Unread postby Rounder » Sun Sep 19, 2010 8:11 pm

Hey guys thanks for the detailed replies Ill try the dynamic brakes next time i hit a grade and in the yards. The gist of what im reading in this thread is to learn the tracks. Thanks a bunch, im sure ill be back with some more Q's shortly

LoneWolfDon ill check your stuff out thanks!

Lastly, how hard is it to create scenarios on existing routes? Can you tweak existing scenarios?
Rounder
 

Re: Driving Tutorial for a total newb

Unread postby Chock » Sun Sep 19, 2010 9:27 pm

Hi and welcome. You'll be surprised at the number of people who buy train sims that aren't - or at least weren't - that into trains, so you are certainly not alone in how you found yourself ending up with a train sim. A lot of people try them out of curiosity and are surprised to find them entertaining or challenging. Because that is the case, you are also not alone in finding yourself with a train sim and not really knowing much about how trains work, i.e. what the signals are and such things, but it is like anything else, you get familiar with it and start picking stuff up the more you mess around with it. But to answer a few of your question...

Braking, like accelerating, is a case of judging the situation and for that, experience is helpful, but you can get pretty good at it by using the F3 window in Railworks and looking at the upcoming speed limits, then make a decision on speeds based on that. As already noted in a preceding answer, speed limits are exactly that and should be obeyed, so you'll have plenty of opportunitites to perfect it. In reality they can be for a number of reasons for speed limits, such as a safe limit for keeping your engine on the tracks on curves, or to give people using grade crossings (aka level crossings) a good chance to see and hear you coming. On the subject of which, you need to blow your whistle (or horn) and have enough time to do that in order to warn traffic of your approach, which is another reason why there may be a speed limit. There are various standard signals you can give with your horn incidentally if you like realism: Two blasts when you are about to move off; Three short blasts before backing up; Two long blasts, one short and then another one long when approaching a grade crossing, with the last blast kept going until your engine starts crossing the grade and is visible to traffic. These signals differ in various countries and there are a lot more signals you can make with your train horn, but that's good enough to get you started.

As far as brakes are concerned, you can use whatever brake you deem suitable when you think it is needed, but there is one caveat to bear in mind with the train's brakes, which concerns the air brakes: Theoretically, air brakes on a train are a fail-safe system because they actually work by applying the brake harder when less air is in the brake pipe system. Each wagon has an air reservoir under it that applies the brakes to that wagon, but the opening of the valve on that wagon air reservoir is triggered by you actually reducing the air pressure in the brake pipe that is connects all the wagons to your locomotive, so you blow out air from the system to trigger the air reservoirs under each wagon. Most air brakes operate this way so that if a coupling on a car breaks and a carriage or wagon is separated from the train, the air in the brake pipes will vent to the atmosphere, and with no pressure in the pipe, the air reservoir valve trigger on that wagon will apply the brakes with the air that is in the wagon's own air reservoir in the same way that you operate them from your loco. You might suppose this means you could never find yourself in a situation where you'd run out of braking ability with the air brakes, but that isn't the case, and this is where you have to be careful: It is the loco's air that feeds down the pipe along the train which tops up the wagon air reservoirs, which could potentially cause a problem if you are careless; such a scenario goes like this...

If you have a big heavy train and you are on a long hill downwards, and you make the mistake of repeatedly applying the air brakes (i.e you 'ride' the air brakes), you can find yourself in a situation where the reservoirs in the wagons will end up very low on air from having constantly used it up in repeatedly applying the brakes to the wagons. Those reservoirs only charge up with air when the brake pipe pressure is higher than the wagon reservoir pressure, since you have to open a valve in them to feed them with air, and with repeated use of the brakes and a consequent reduction in the bake line pressure, that won't happen, especially on a long train. In that situation, you will run out of air braking ability, which is the typical scenario when a train becomes a 'runaway'. On very long trains it can take several minutes for a locomotive to fill up the reservoirs on all the wagons it is towing, which is why freight trains almost always do a brake test and also tend to sit there for a while before setting off when they have coupled up lots of wagons.

So to avoid that problem, you should be wary of overusing the air brakes on a train when running downhill. In railroad slang, using up all your air with repeated applications of the air brakes, and so getting into trouble, is called 'fanning' the brakes, or sometimes by the more pithy expression: 'p*ssing away all your air'.

To avoid such a situation, you can use the dynamic brake when going downhill in combination with the air brakes, which will give your air brakes a chance to recharge and so keep the wagon brake reservoirs topped up. Dynamic brakes work on the locomotives wheels by using the engine motors as dynamos to brake the locomotive with electro-motive force on the motors and hence the wheels. Incidentally, if you like realism, you should never use reverse to try and brake the engine and instead only switch the reverser when at a standstill. Braking by reversing the wheels will actually work in Railworks, but on a real locomotive it would be a very damaging thing to try.

Sand does indeed increase the traction, by spraying it onto the track and giving the wheels something to grip onto. If your engine starts slowing down on a gradient or in slippery weather, that's when you should use it. In reality, locomotive are topped up with sand when they are refueled at depots, but you probably won't have to worry about it in Railworks.

The scenarios can sometimes be a bit crappy in terms of describing where you have to go, so you will probably have to use a combination of the F6 key and the 2D map to navigate, and of course learn the routes. You can view that either as a pain in the butt, or a challenge, depending on your disposition!

You can check or set the switches head of time quite easily by going to the external view and hitting '8' on your keyboard to free up the view, then move your view with the cursor keys on your keyboard and check all the switches, tripping any you might need to if they are set against you or on the wrong line.

With regard to scenario creation, there are plenty of freebie scenarios kicking about if you look online and don't want to create them yourself, and of course most payware content has some thrown in. Be aware that there are lots of places other than Steam which sell downloads, so don't regard the Steam and Railworks pages as a comprehensive list of what is out there for you to buy or get for free.

Last but not least, steam locos and driving them: This is something more akin to an art than a science in the real world, and it can be tricky in Railworks too. If you absolutely want to do it like the real thing, then you should buy this book: http://www.amazon.com/Engine-Drivers-Ma ... 686&sr=1-1 However, if you just want to give it a try, you can find plenty of tutorials online for driving simulated steam trains, as well as some in the manuals that come with Railworks, so I won't reinvent the wheel by writing them out again here. That book I posted a link to incidentally, is really worth a read, as it is unique and fascinating stuff, so well worth the price.

Hope that helps.

Al
Chock
 
Posts: 44
Joined: Mon Sep 06, 2010 10:25 pm
Location: UK, Stockport

Re: Driving Tutorial for a total newb

Unread postby LoneWolfDon » Sun Sep 19, 2010 10:00 pm

Rounder: See, I told you other more knowledgeable people would probably give some great advice !!*ok*!!
I know things can seem rather confusing at times, but try and just have fun with it and don't overly worry about if you make some mistakes sometimes - it is a game after all when it comes down to it (though some people prefer to call it a "sim" rather than a game. But both terms work for me), so no harm done even if you mess-up big time when playing a scenario.
And for me, if I get too confused or frustrated with any particular scenario (especially the ones that involves a lot of shunting and junction-hunting), I may just simply move on to play a more easy scenario or just drive a train in Free-Roam, as there's lots to choose from.
Hope you will continue to enjoy RailWorks and become an active part of the wonderful community we have here.

Chock wrote:Hi and welcome. You'll be surprised at the number of people who buy train sims that aren't - or at least weren't - that into trains, so you are certainly not alone in how you found yourself ending up with a train sim. A lot of people try them out of curiosity and are surprised to find them entertaining or challenging. Because that is the case, you are also not alone in finding yourself with a train sim and not really knowing much about how trains work, i.e. what the signals are and such things, but it is like anything else, you get familiar with it and start picking stuff up the more you mess around with it. But to answer a few of your question...
Al


Chock: This is me. *!greengrin!* I've grown more of a fondness and interest for trains since owning RailWorks and gradually learning more about trains and the whole train-simming scene in general, though my knowledge is still quite largely lacking in many ways in regards to trains. But I don't worry about all the particulars and little details, mainly I just relax and enjoy. Btw; Nice informative and helpful post.
RailWorks Route & Scenario addons, video tutorials and other resources at http://www.RRYard.com
User avatar
LoneWolfDon
 
Posts: 279
Joined: Wed Dec 16, 2009 1:41 am
Location: Canada

Re: Driving Tutorial for a total newb

Unread postby Rounder » Mon Sep 20, 2010 4:14 am

Thanks guys and chock I am into the realism so thanks for the horn info. Speaking of realism, I was curious about junctions. Since the handles for them are on the ground, I assume its the train engineer that handles all the junctions himself. So if I wanted to play a more realistic sim, would I not stop at every junction point that needs switching to manually switch the junction? How do they know (IRL) which side the junction is set? I could imagine nowadays they have GPS and electronic gear but what about before all that stuff?

Finally I have 2 more questions about braking and accelerating. I noticed on some trains (and easy mode) the brakes were at 22% but were released. Does this tie into what Chock was talking about with air pressure? On expert mode should I keep them at 22%?

And on acceleration, do couplers have any kind of shock absorbers or is it metal on metal? I read in another thread that you need to give time for each wagon to 'settle' for lack of a better term. so I've been accelerating one tap of the keys at a time, every 20 seconds or so. would it not be better on the wagons to have a constant steady acceleration? I know its faster that way but on the last scenario I ran (york coal night run) I did the tap method and I managed to only have 2 errors, a wheel slippage and a use of the Emergency brake (by accident, hit the backspace key looking for the loco brake, and I'm playing in the dark :P ). Its the first time I've not had any of those 'discomfort' errors, or whatever they are called. Thanks again guys.
Rounder
 

Re: Driving Tutorial for a total newb

Unread postby Chock » Mon Sep 20, 2010 7:35 am

Experienced railway guys would probably know which way the handle was for which way the points were set, but the general rule is that they are left on the main route rather than a setting which would take you onto a siding, so in theory at least, you would switch the points back to the main line after you had passed them, but in Railworks it doesn't matter so much if you don't. Note that there are keyboard keys to switch the points (G switches the point in front of your train for example). In the real world, this is why both locomotives and cabooses have steps and platforms at either end, so that the train can move slowly and someone can ride on these platforms or steps, hop off, switch the points and then hop back on, and in the real world, people who do that are trained to grab the railing that is nearest the direction of travel so that they get hauled up onto the steps, because if they grab the rearwards railing, it will swing them under the wheels. This is also one of the reasons why speed limits are slow in yards, so that people can get on and off the loco or caboose in order to operate switch levers. You can simulate doing that in in Railworks with the shift+2 key combination.

Of course as in real life, you will come across both manual point switches and automatic ones that are controlled from a signal box or control centre. In the case of those controlled from a signal box, there is invariably what is known as a 'Block System' in place. This is where the route is divided up into blocks with signals at the start and end of each block. There will be a board up on the wall in a signal box with a diagram of the rail layout and lights on the board in each block. As a train enters a block, a light will go on up on the board in the sector the train has entered to indicate on the board that there is a train occupying that part of the track (these can be triggered in a number of ways, although usually it is via a magnetic system with something under the locomotive that triggers a detector on the track (this usually located right underneath the front end of the loco and invariably hidden from veiw by the couplers and snow plows etc). More sophisticated systems installed on tracks can actually count how many wagons are going over them too and indicate that count to a controller via his signal board. Some track systems can even send a radio signal with an audio recording of a voice message which informs the driver of any potential problems ahead in a manner similar to the recorded hourly information that pilots get from airports when they tune the appropriate airport frequency.

To keep things organised, when one train enters a block, the signals by the trackside change to indicate that block is occupied, and when the train passes into the next block and triggers the next block detector, the signals change again to indicate the previous block is clear. That's what all those cables running alongside the tracks do and why there are sometimes delays on trains, because thieves sometimes steal the wire for its scrap metal content, and occasionally electrocute themselves in the process.

Thus there should only be one train in each block at any one time if things are going to plan, although in switching yards, things are often done simply by looking out for danger, so that block system is more geared towards preventing collisions on main lines. The Block System is pretty much universal on railways around the world, since it is a simple yet effective means of keeping things safe, although in more recent times, it has been augmented with automatic warning and protection systems which trigger an alarm if a train has passed into a dangerous location or is getting near another train, which is why such a system isn't much use in a switching yard, since by their nature, locomotives in switching yards have to trundle up to other wagons in order to couple them up.

In modern signal boxes and control centres, the system is even more sophisticated, whereby instead of simply a light on a board indicating that there is a train occupying a block, there are what is known as 'train describers', which give the signal and switch operators information about the train and where it is going, thus the controllers know which switches to throw in order to route the train correctly. On some trains around the world, this info also used to appear on the front of the train itself on the headcode board numbers, although in modern times, this has given way to computer systems. But if you ever see pictures of, for example, 1960s and 1970s locomotives in the UK, you would see codes such as IE06 on the number boards at the front of the loco, which could tell you what train it was and what route it was on if you knew what all those codes meant. In the US however, the numbers on the front of a loco are simply the locomotive's inventory number, so the route identity code system was by no means universal. Nevertheless, all that block signaling system was mostly well established before the 1920s and even things such as train describers were fairly common by the late 1930s, so this is a system that has been in place for the most part, for 100 years or so, and the system we have today is really just a refinement of that which incorporates computers as opposed to cables, pushrods and telegraphs.

In addition to all that signal and indicator malarkey, a real locomotivce and indeed a locomotive in Railworks too, has a built-in warning system. If a train goes into a sector where there is some sort of potential danger, an audio warning sounds and a button in the loco cab has to be pressed to cancel the warning, which if left unchecked, would then trigger the brakes automatically and stop the train (Q is the key to cancel it in most train sims). This is what the 'dead man's handle' principal which you have probably heard of is all about, i.e. if the train driver dies at the controls and is therefore unable to cancel a warning, the train would stop, although in some locomotives, there is also the additional safeguard of the driver actually having to hold the throttle in position, so that again, if he was incapacitated, his hand would slip off the throttle. In films where they have runaway trains, they usually have to come up with some clever excuse to get around that, for example, in the movie 'Runaway Train', they have the brake blocks burn out and the system fail so that the train can run away when the driver dies. Since that is extremely unlikely to happen in real life, when the Alaska Railroad, which was used to film Runaway Train agreed to let the film-makers use their system to make that movie, they insisted that the locos did not have their railroad name on them, which is why the locos in that movie all look mean and moody in their black/brown paint jobs.

To get a better handle on what all that 'lap' 'self lap' 'released' and 'application' stuff is about on train brakes, I'd recommend having a read of the following link (that website is worth bookmarking by the way): http://www.railway-technical.com/air-brakes.shtml

With regard to couplers, it depends on which country you are in (or simulating being in). In the UK, and indeed most of Europe, the buffer and chain system is still very common on freight trains, i.e the buffers separate the cars, but the chain attached to hooks on the cars is what connects them, so that's not a rigid system of connection. In the case of the UK you can expect that to change eventually, since UK freight is in fact often owned by the Burlington Northern and Sante Fe railroad (i.e Direct Rail Services is owned by BNSF). That American ownership has influenced locomotive design in the UK, notably with the Class 59 and Class 66 locos, which are American SD-40-2 locomotives with a UK-style body grafted onto them, so it is also likely to influence stuff such as couplers as well in the end. Until such change happens however, the buffer and chain system will still be common in the UK, and that is indeed cushioned by the buffers being spring loaded. It is also why guards vans in the UK were often referred to as 'brake vans', because in order to keep the tension on buffer and chain couplers manageable, UK freight trains were often run with the brake van having its brakes partially applied (brake vans are also heavily weighted to assist that effect too).

In most of North America, and indeed much of South America too, wagons are coupled using the Janney coupler, although it is almost never actually referred to as a Janney coupler, and is more commonly called a 'knuckle coupler'. This is a far more sophisticated method than the buffer and chain system, which is why you are starting to see a similar type of coupler on most European commuter trains, including in the UK. The knuckle coupler is cushioned to some small extent too, although there are in fact several variations in design, the most modern of which actually has built-in deformable bolts behind it which act as crumple zones in the event of a crash, but in any case it is rigid enough to keep trains under sufficient tension to make buffers unnecessary on US rolling stock, since a knuckle coupler actually weighs about 50 lbs, so it is a pretty tough component by itself, which is a good thing. The knuckle coupler has the advantage of being automatic too, i.e you smack two knuckle couplers together they will hitch automatically, leaving only the brake pipes to be connected manually. This is much safer, since you don't need someone down on the track between the wagons when actually coupling them. The disadvantage of the knuckle coupler is that because it is more rigid than the buffer and chain system, if you put too much tension on the train with acceleration, you can break the couplers and it is not unknown for freight cars to have been torn in half before the coupler actually broke, although it is worth bearing in mind that US freight trains are often over a mile long, so that's a lot of weight and momentum to be dealing with. Eastern European and Russian trains have a different coupling system, called the SA3, but it is basically very similar to the US knuckle coupler.

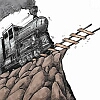
So for any of those coupling systems, you need to be smooth and take up the slack gently, then keep it under tension as best you can. You then slow down as gently as you can too, so as to avoid the wagons all smacking into one another if operating a UK train with the buffer and chain couplings. One other thing to bear in mind is accelerating on a curved section of track, which can cause a derailment if you do that too violently. To understand why that is so, picture a toy train on a circular track and imagine pulling the loco very quickly, the force will pull in a straight line from the loco to the tail end wagon rather than through all the couplers and all the wagons will tip over off the track. This is known as a stringline derailment, and is one of the reasons why on long trains through curvy tracks (common in mountainous terrain in the US), there is often a loco at the back of the train and one in the middle of the train, so that the force pushing and pulling the train is not all coming from the front end of the train. This is called 'distributed power'.

If you want some useful info on how and when to apply power to a loco, then I can recommend looking here, where you will actually find many real manuals for locomotives: http://gelwood.railfan.net/manual/manual.html

Hope that helps.

Al
Chock
 
Posts: 44
Joined: Mon Sep 06, 2010 10:25 pm
Location: UK, Stockport

Re: Driving Tutorial for a total newb

Unread postby Rounder » Mon Sep 20, 2010 4:32 pm

Chock my head wants to explode, luckily it will be a slow night tonight at work, ill have plenty of time to read. :)
Rounder
 

Re: Driving Tutorial for a total newb

Unread postby Chock » Mon Sep 20, 2010 6:19 pm

Don't worry, it's not as complicated as all the above makes it sound, and most of that info is simply of interest to anyone curious about that kind of thing. To sum it up: You should brake and accelerate gently, you want to use the air brakes on the train sparingly and mix that with dynamic braking, and you can make life easier by going on an external view (press the 8 key) and move your view up the line (with the cursor keys) to find out what is ahead and ensure your route points are all set up and check you are going the right way, pressing F6 when you do that will identify what everything it with name tags, so you can be sure of which place it is you want to go to. And if all else fails, watch the distance in the F3 window; if it is getting smaller, you are going the right way. Everything else is just a case of getting used to it.

Al
Chock
 
Posts: 44
Joined: Mon Sep 06, 2010 10:25 pm
Location: UK, Stockport

Re: Driving Tutorial for a total newb

Unread postby nightcrawler766 » Wed Jul 11, 2012 11:55 am

I've been using Railwork TS2012 for a couple of months now getting pretty good driving trains, I'm having difficulty with downhill runs on Cajon pass and Horseshoe Curve, I apply somewhere between 9 and 13% dynamic brake to control speed and alternate with train air brakes but have been derailing, not sure exactly why as my train is running at or below the posted speed limit am I doing something wrong with the dynamic? So after a couple of derailings I stopped using the dynamic, now if posted speed downslope is say 55 I start downslope at 45 and coast up to about 53 then apply airbrakes to slow to about 43 and then coast back up to 53 again and i'm not having the derailing issue when doing it that way but one time i got into a runaway situation (luckily I had saved previously) can some one please give me some braking advice? please explain how you drive downslope so I can copy it.
nightcrawler766
 

Re: Driving Tutorial for a total newb

Unread postby PamBrooker » Fri Jul 20, 2012 2:46 am

I thought they fixed that derailing problem..
Part of the problem was the way the couplers were modeled. In RW, they stretched, sometimes up to ten feet.. Not very realistic. the stretching allowed for the back of the train to be traveling at a different speed than the front of the train, so, going into a curve as the front of the train slowed down, the back would push forward and cause a derailment. Other times, if the front of the train sped up coming out of a turn, it would cause a rubber band effect where the back of the train would snap forward and again collide with the rest of the train, which again caused derailments.
One test i ran with a sixty car train even had derails happening on a fifty mph curve at five mph.. The best recommendation i can give personally is to place a second engine at the back of the train and limit its length to under thirty cars. Its not a perfect solution, but it may help..

Driving downslope for me is probably not very realistic and depends on the engine and the grade.. for grades up to 6% with engines that dont use dynamic braking, i'll set the train brake o 13% and reverse the engine. that way i can use the engines power to slow down by increasing the throttle and if need be, the brake as well..
Image
PamBrooker
 
Posts: 456
Joined: Sun May 09, 2010 6:14 am
Location: Bend Oregon

Re: Driving Tutorial for a total newb

Unread postby Kali » Fri Jul 20, 2012 5:17 am

Think this came up in another recent post, problems seem to be in 2 areas:
  • Engines with dynamic brakes set up in the wrong units, so they're 5x as strong as they should be
  • Couplers very much too soft

Both of which need editing of game files to correct, so sadly if you're not confident in doing that there's no easy fix :(

Some dodgy info on UK practice up the thread; DRS is actually owned by British Nuclear Fuels Limited ( you can see the confusion in the initials! ) which is a UK govt agency for clearing up and reprocessing nuclear waste. If anyone is a bit more interested in UK practice they didn't get the couplers quite right either; the loose chain couplers on the older unbraked wagons are ok, they have some slack which used to build up down the train & occasionally either snap a coupler or pull the train guard off his feet when the brakevan at the end of the train got snapped into movement, but the version with the screw thread which is used all over Europe too - and so we're always going to use that as well - is screwed up tight until the buffers are partly compressed together, so there's no undamped slack there at all unlike how RW does it. The default european stock doesn't seem to suffer as badly as the US from misconfiguration though. We haven't used loose couplers/brakevans/unbraked stock for about 25 years now.
Kali
 
Posts: 1600
Joined: Mon Mar 14, 2011 1:00 am
Location: England-by-Sea


Return to General Discussion

Who is online

Users browsing this forum: No registered users and 46 guests